
 From Uncode 2.3.0, it's possible to create custom WooCommerce Cart, Empty Cart, and Checkout pages. With the new modules and integrated options, you can create the ultimate shopping experience consistent with your website's design and your clients' needs.
Unlike the WooCommerce Product Builder, where each layout is created with many different modules, the new Cart, and Checkout modules incorporate all the options inside a single module itself. Experienced Uncode users will find within these modules options that they already know, such as some options of the Column module (including Skins, Custom Padding, Vertical Align, Shadows, and Off-Grid), or options of the Heading, and Button modules.
Cart
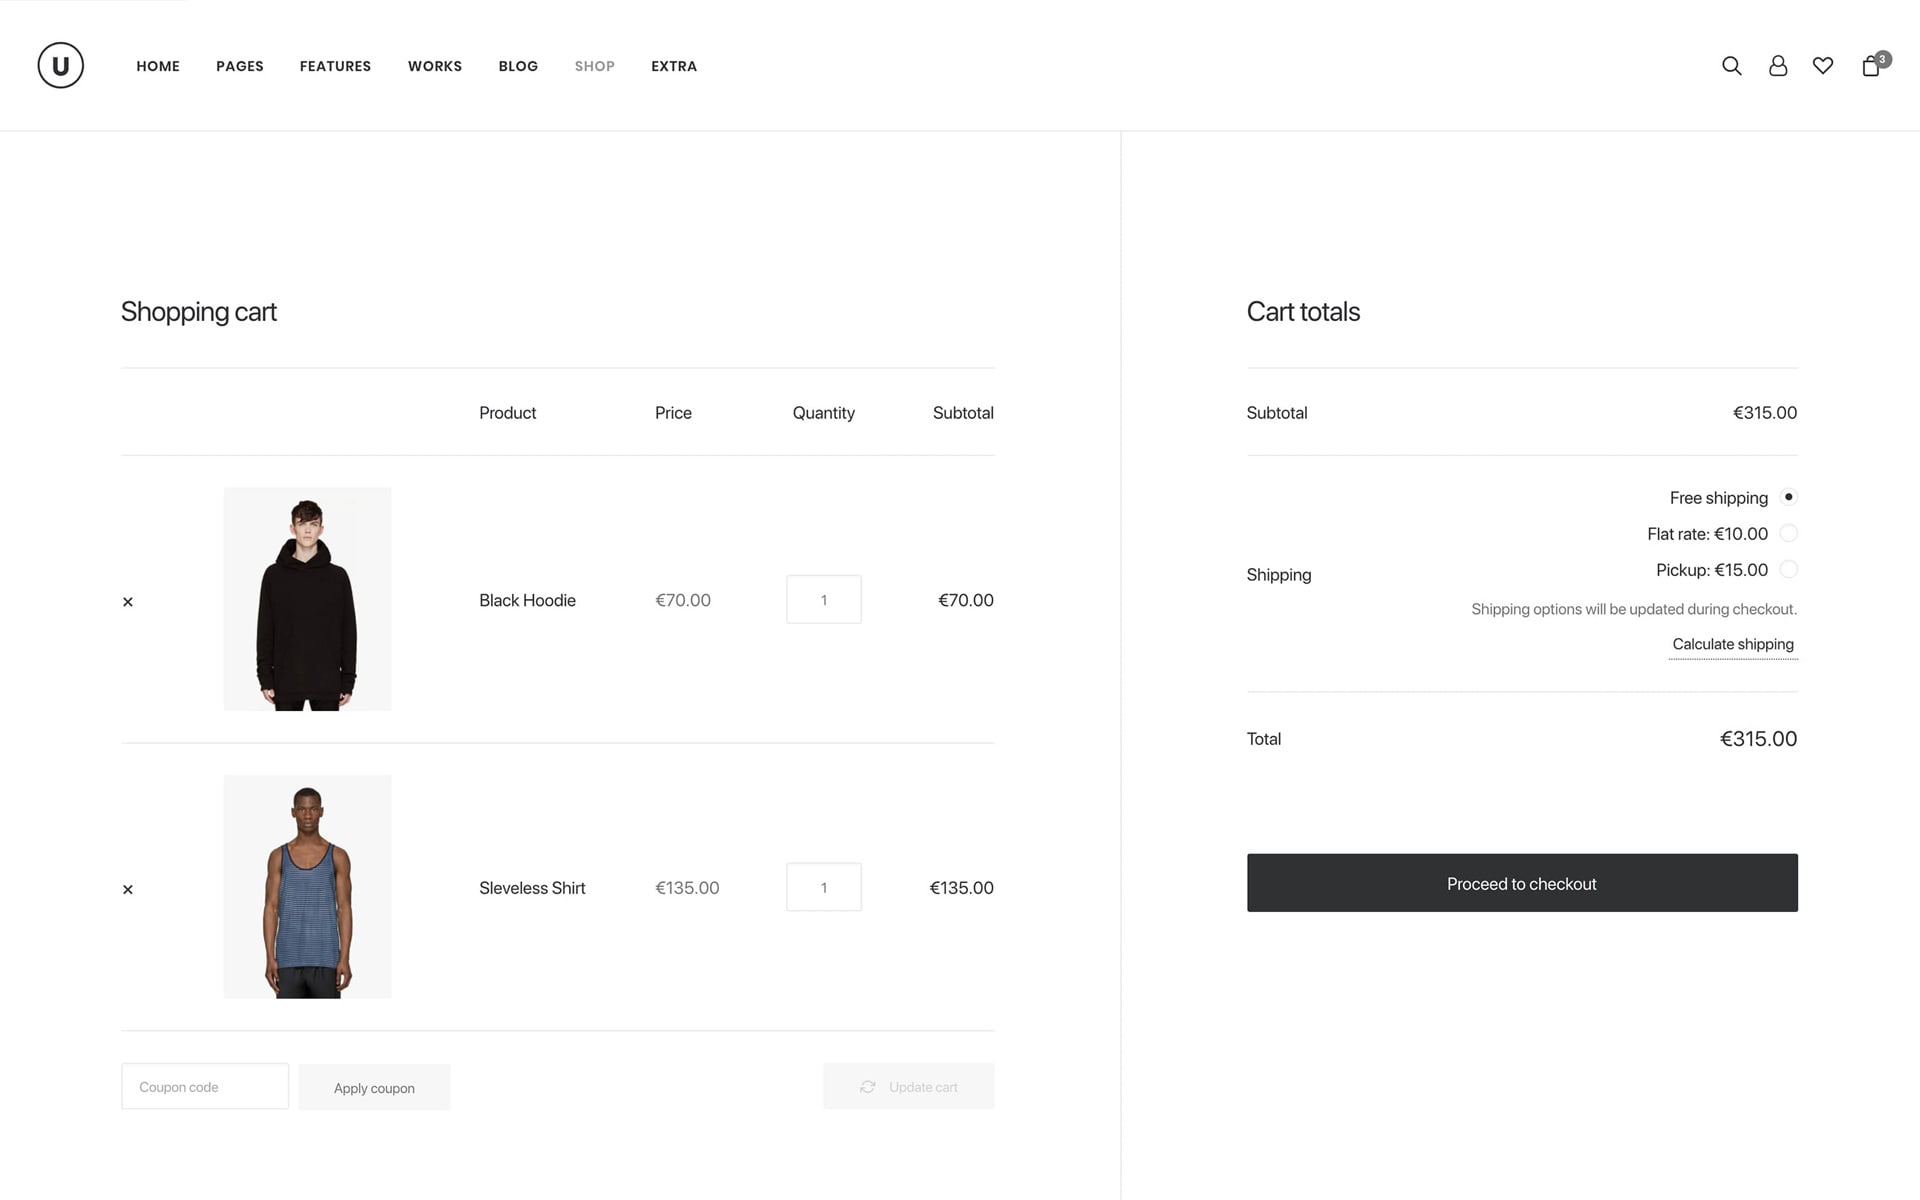
A cart page is an essential part of every eCommerce website. It is the page where users can pile up what they want to buy from the website and then simply checkout by paying online. To comprehend what a cart page does, think of it as a normal shopping cart in a store.
How to set up a custom Cart page
If you need to set up a new Cart page or change what page is used, follow these steps:
- Create a new page or insert it into an existing page, the new Cart module of the Page Builder, screenshot .
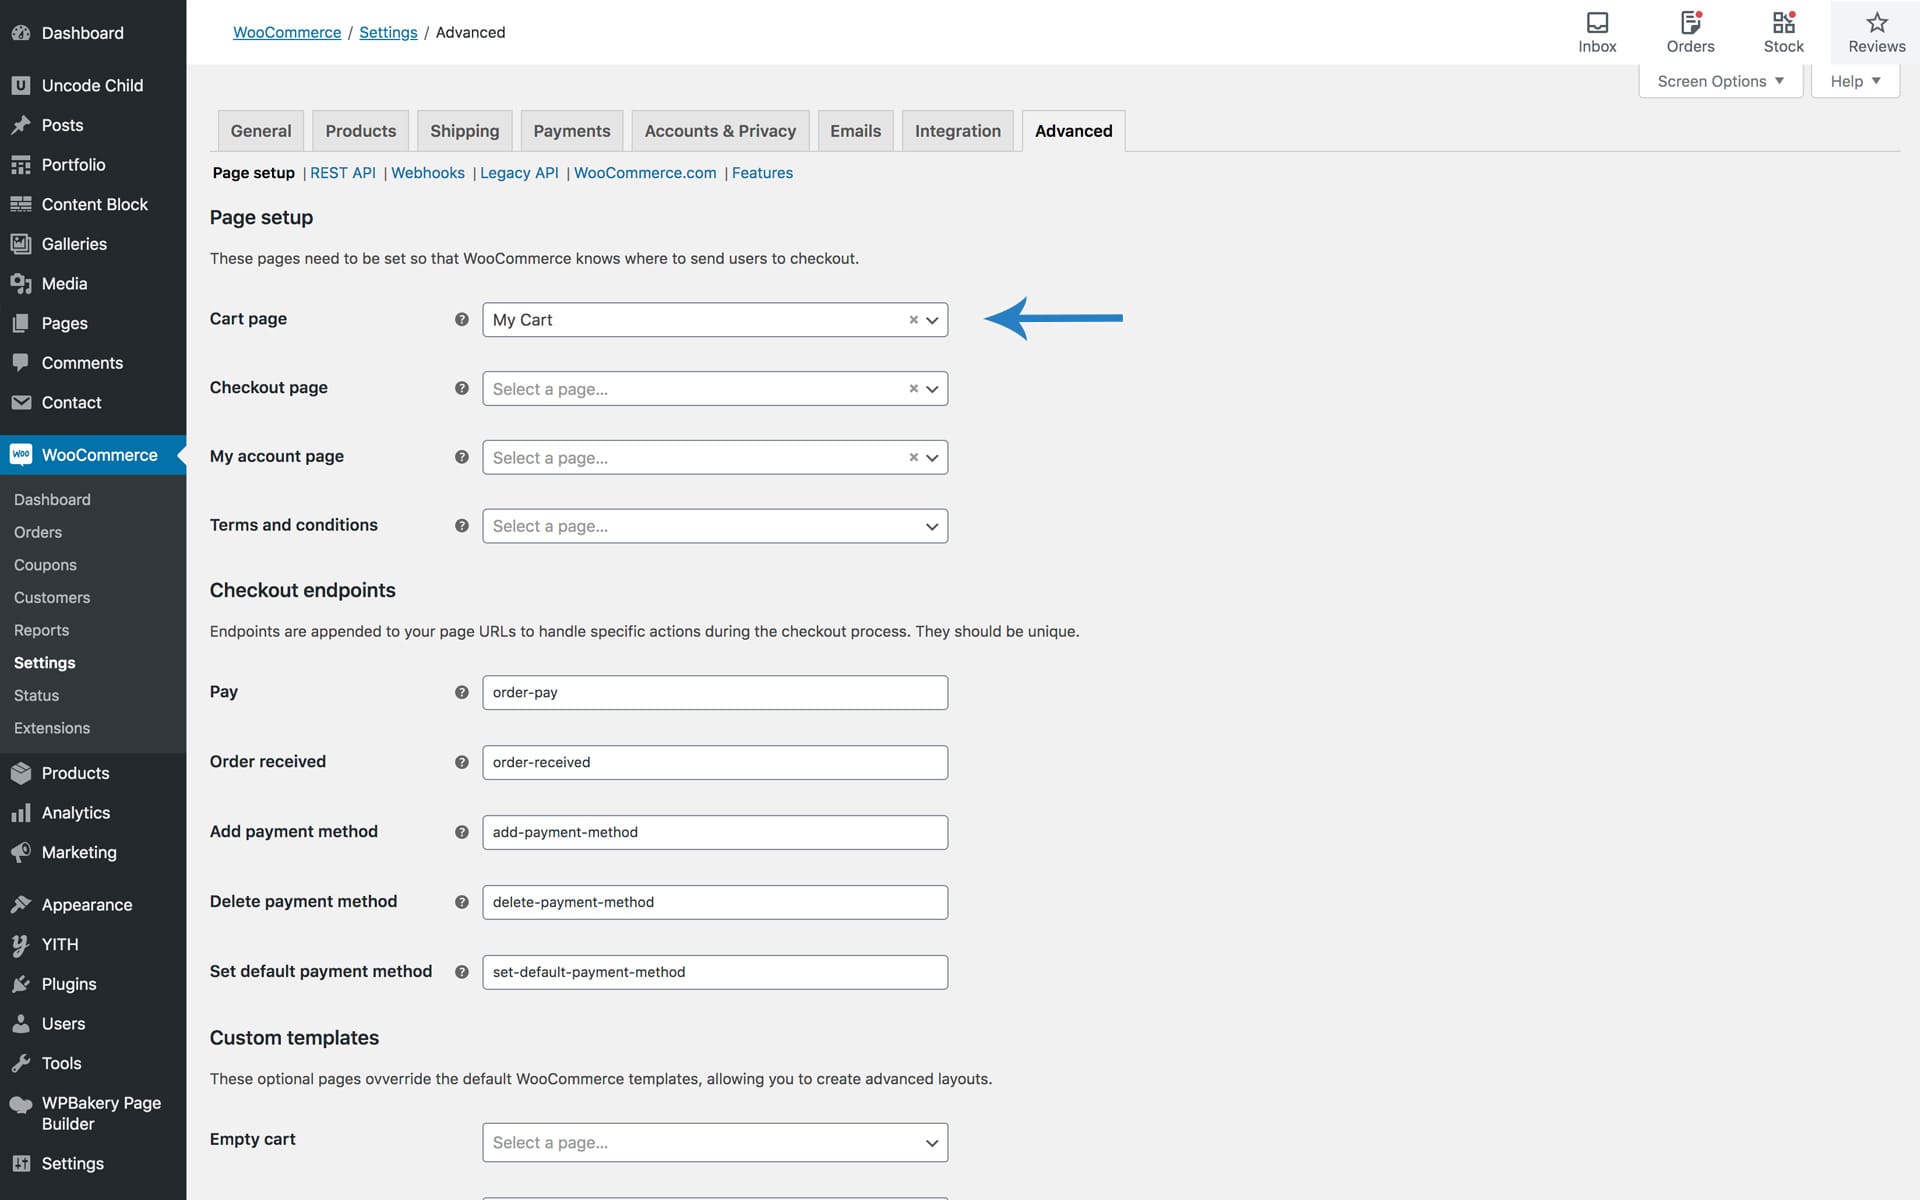
- Navigate to WooCommerce → Settings → Advanced → Cart page and select from the dropdown your newly created Cart page so that WooCommerce uses this page as Cart, screenshot .
Cart module settings
The Cart module allows you to create many different Cart layouts. Inside this module you find the options divided into the following tabs:
- General: Here you find the most important settings to define the Cart layout. It can be Vertical or Horizontal. When you activate the Horizontal mode, you have additional options like the Main Column Size, Columns Gap, Columns Equal Height.
- Cart Table: The Cart Table is the area of the Cart module with a summary of the products inserted in the shopping cart. In this tab, you find options such as Heading Visibility, Hide Table Header, Thumbnail Size, Compact Layout, Custom Padding, Skin, Background Color, Border Radius, Shadow, Sticky, and Off-Grid.
- Cart Totals: the Cart Totals is the area of the Cart module with a summary of the costs (Subtotal, Shipping costs, and Total). In this tab, you find options such as Heading Visibility, Custom Padding, Skin, Background Color, Border Radius, Shadow, Sticky, and Off-Grid.
- Cross-Sells: the Cross-Sells is the area of the Cart module where the Cross-Sells products are presented (these are products that you promote in the cart, based on the current products inserted in the Cart). Please note that Cross-Sells is optional. Here you find options such as Enable Cross-Sells, Heading Visibility, After Cart Table, Custom Padding, Skin, Background Color, Border Radius, Shadow, Items Desktop, Items Tablet, and Items Device.
- Typography: In this tab, you can define the Typography of the Cart elements (Heading and Text).
- Buttons & Forms: In this tab, you can define Buttons & Forms of the Cart module. You can create a custom Button configuration, set the alignment, and define the Form style.
- Extra: In this tab, it is possible to insert an optional Element ID, and an optional Extra Class Name useful for those who want to further modify the module with customs code.
Tip. To edit your Cart page we remind you that you must insert some products in the Cart, otherwise, WooCommerce will automatically show you the Empty Cart page.
Empty Cart
The Empty Cart is a page that WooCommerce automatically shows when a user has no product in the Cart and tries to access the Cart page. This page is also shown when a user removes all products from the Cart. This page is essential to drive traffic of these users to the shop again and potentially restart the shop experience.
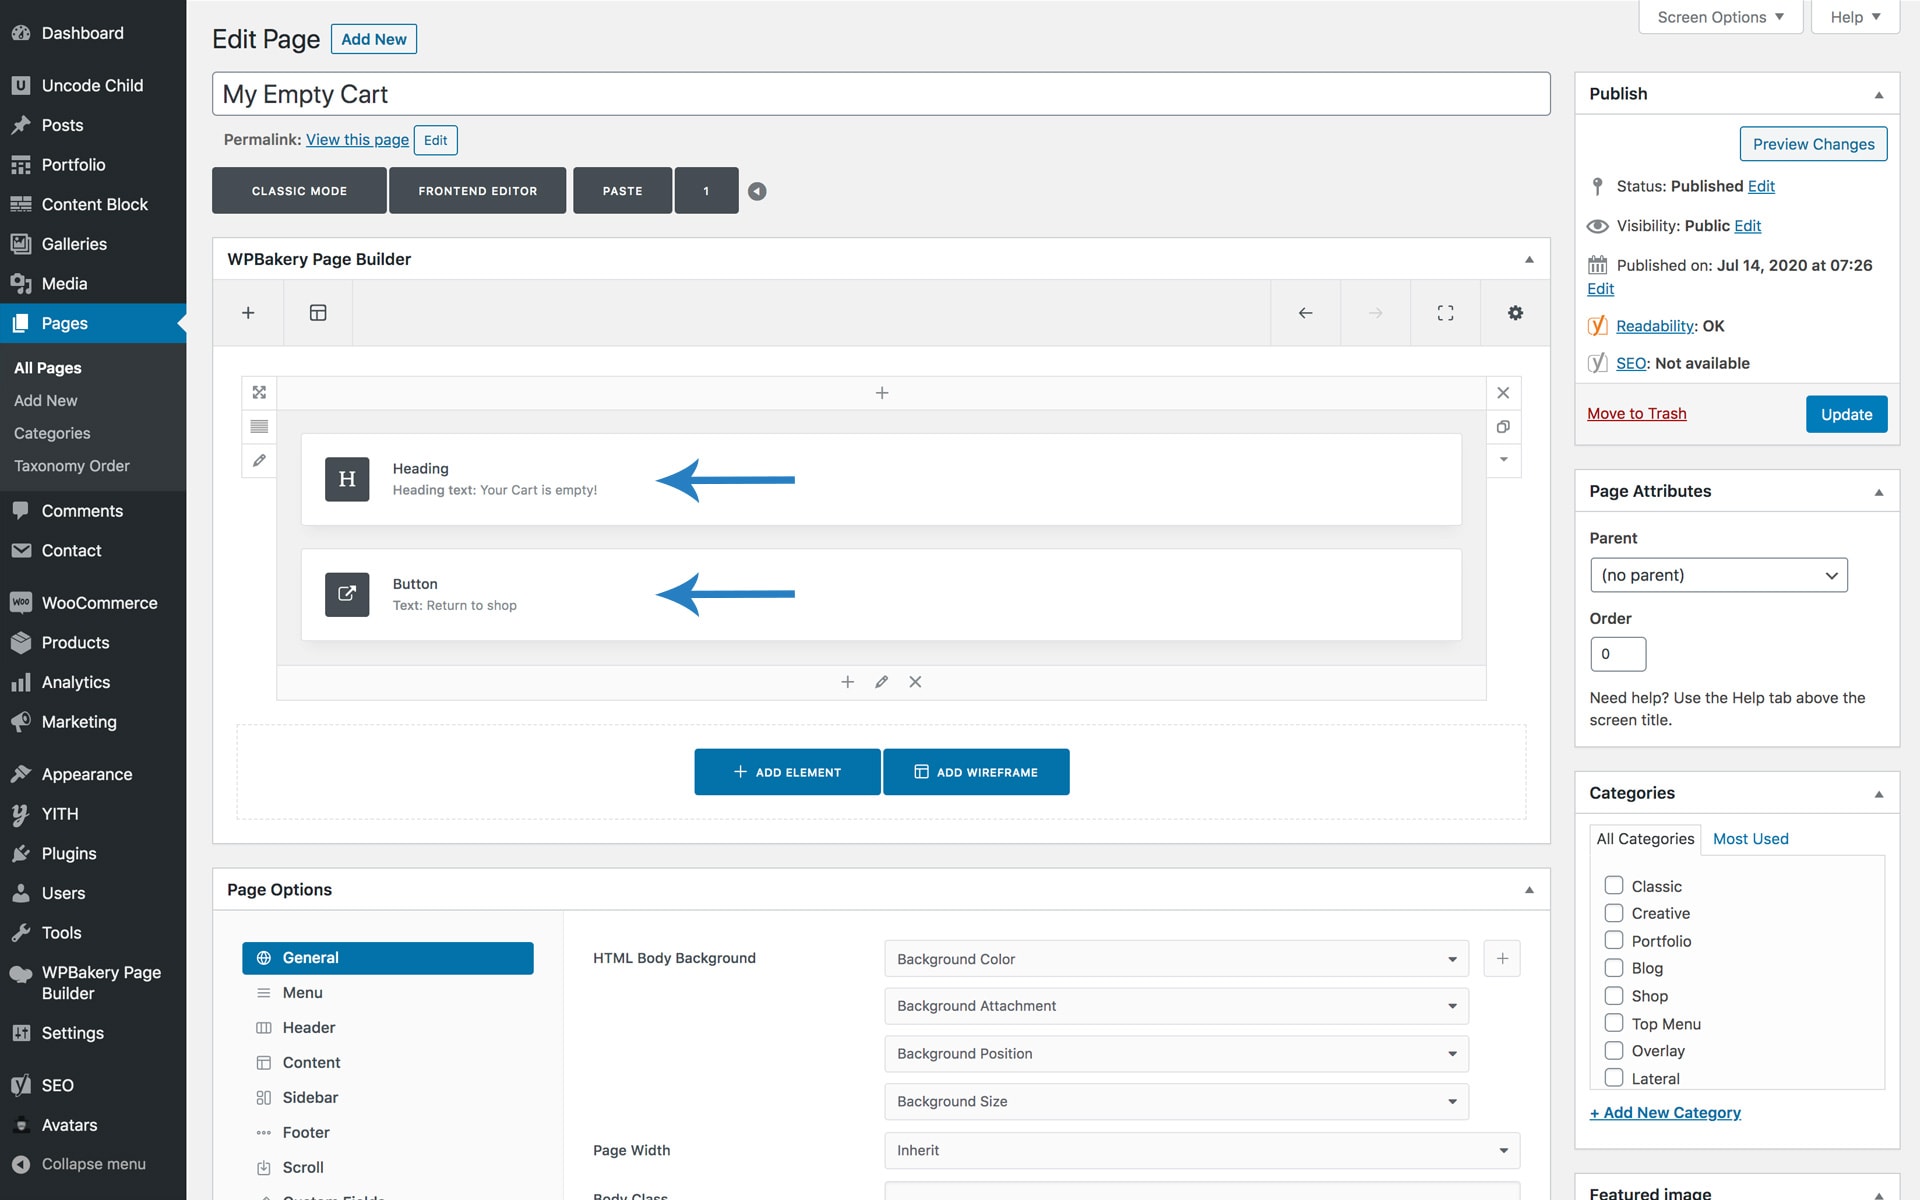
The default WooCommerce template looks basic, and it shows the "Your cart is currently empty." with the "Return to shop" button, screenshot . To improve this page in Uncode we have inserted the possibility to create a completely custom Empty Cart page. You can create it yourself or use one of the templates we designed.
How to set up a custom Empty Cart page
If you need to set up a custom Empty Cart page, just follow these steps:
- Create a new page and insert it into this page the elements you want to use. We suggest you to use at least one message and one button leading to your main shop page, so as not to differ too much from the standard. Optionally, you can insert everything you want on this page, such as a list of your best-selling products
- Navigate to WooCommerce → Settings → Advanced → Empty Cart and select from the dropdown your newly created Empty Cart page so that WooCommerce uses this page as Empty Cart, screenshot . Please note that if you do not choose this setting, the default Empty Cart page will be used.
Checkout
A checkout page refers to a website page shown to a customer during the step-by-step checkout process. Think of a checkout page as the online version of a physical checkout counter in a grocery store.
How to set up a custom Checkout page
If you need to set up a new Checkout page, or want to change what page is used, just follow these steps:
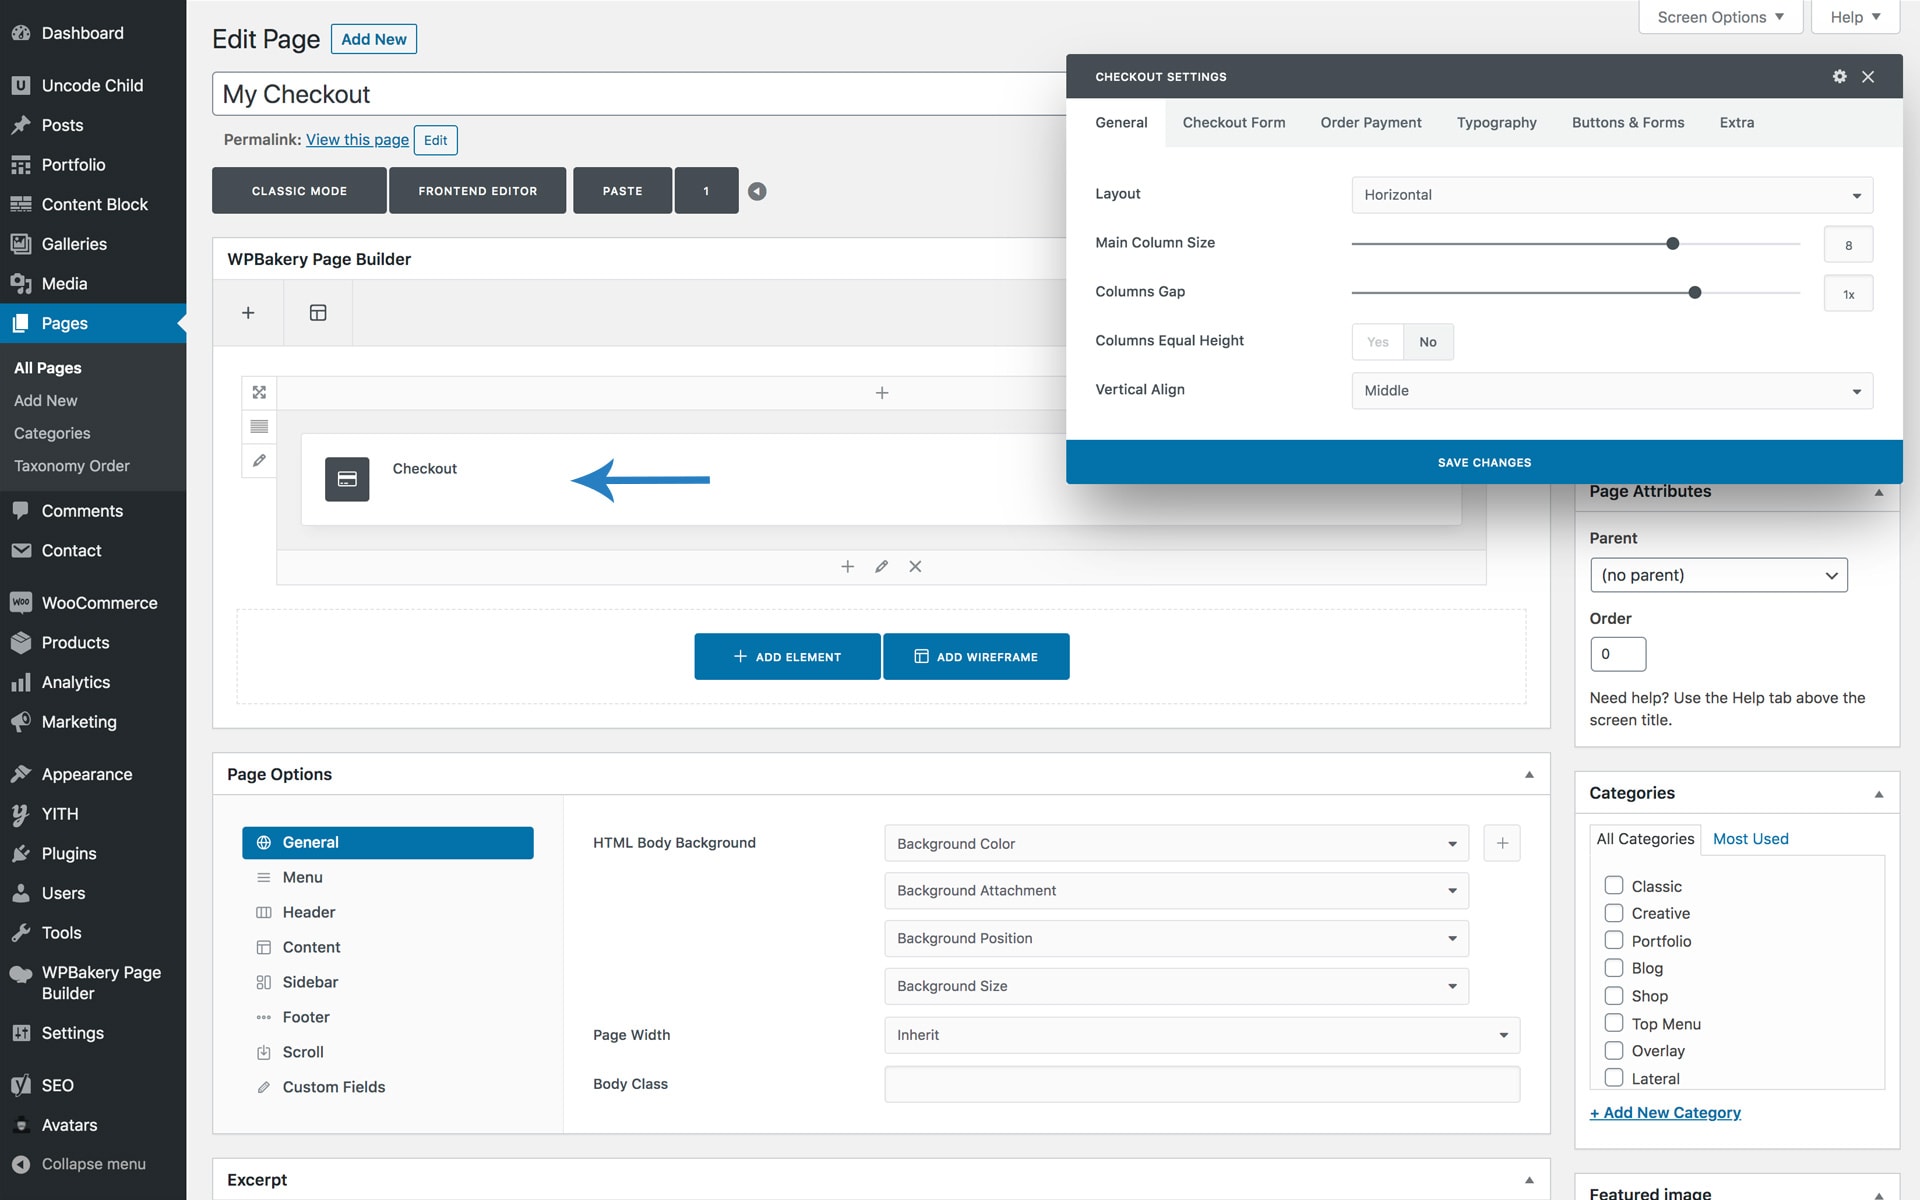
- Create a new page, or insert it into an existing page, the new Checkout module of the Page Builder, screenshot .
- Navigate to WooCommerce → Settings → Advanced → Checkout page and select from the dropdown your newly created Checkout page so that WooCommerce uses this page as Checkout, screenshot .
Checkout module settings
The Checkout module allows you to create many different Checkout layouts. Inside this module, you find the options divided into the following tabs:
- General: Here, you find the most important settings to define the Checkout layout. It can be Vertical or Horizontal. When you activate the Horizontal mode you have additional options like the Main Column Size, Columns Gap, Columns Equal Height.
- Checkout Form: The Checkout Form is the area of the Checkout module with the Billing Details. In this tab, you find options such as Heading Visibility, Notices Layout, Compact Layout, Custom Padding, Skin, Background Color, Border Radius, Shadow, Sticky, and Off-Grid.
- Order Payment: the Order Payment is the area of the Checkout module with the summary of the order. In this tab, you find options such as Heading Visibility, Hide Table Header, Compact Layout, Show Thumbnails, Custom Padding, Skin, Background Color, Border Radius, Shadow, Sticky, and Off-Grid.
- Typography: In this tab, you can define the Typography of the Checkout elements (Heading and Text).
- Buttons & Forms: In this tab, you can define Buttons & Forms of the Checkout module. You can create a custom Button configuration, set the alignment, and define the Form style.
- Extra: In this tab, it is possible to insert an optional Element ID, and an optional Extra Class Name useful for those who want to modify the module with customs code further.
Note on using the Frontend Editor
- Forms functionalities are disabled. Please note that modules like the Cart, Checkout, My Account, and Account Forms do not work when using the Frontend Editor. The Frontend Editor is a design tool, forms submitting (necessary, for example, for the operation of the Cart) is disabled in the Frontend Editor mode. Of course, a Cart, a Checkout, a My Account, or an Account Form made through the Frontend Editor work when used by the final user.
- WooCommerce files not included. Some native WooCommerce files are not included if you start working on a blank page directly with the Frontend Editor. These WooCommerce files are only included after Uncode understands that you are using one of the particular modules, or even if you are already on a WooCommerce Cart and Checkout page. So if you have minor problems, please save the page and reload it. This way, all the necessary files will be included while working on the Frontend Editor.
- WooCommerce plugins are designed to work with the default WooCommerce layout. Possible extra plugins may fail to work with the custom Cart and Checkout Builder. Our support takes care of issues with popular WooCommerce extra plugins when using the default layout because it is on the default template that these plugins are designed to work by their authors.

Comments
0 comments
Article is closed for comments.